Klaviyo
Connect to Klaviyo to set up custom return guidance, label sharing and more.
Connect to Klaviyo
- Log into Klaviyo and create a private API key with full access on Klaviyo. You can follow this guide.
- Copy the created Klaviyo API key.
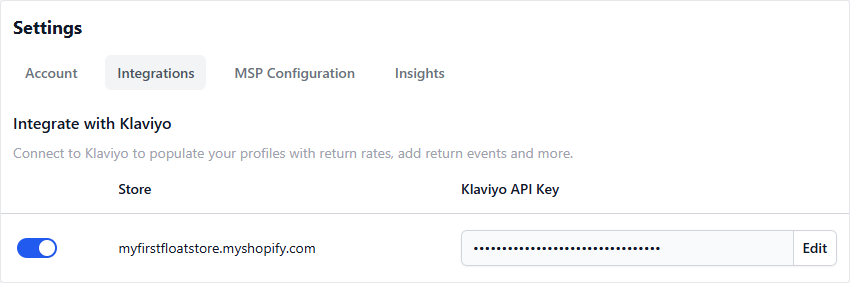
- Now, log into your Float dashboard and navigate to the Integration Settings page. You should see a table with one row for each of your Shopify stores under "Integrate with Klaviyo".
- Paste the copied Klaviyo API key and add it to the corresponding store. Make sure to select the correct row.
- Then hit save. Float will register the key to the associated store and provide return related events you can add in your Klaviyo flow.
Disconnect from Klaviyo
- Navigate to the Integration Settings page on your Float dashboard. You should see a table with one row for each of your Shopify stores under "Integrate with Klaviyo".
- Choose a store and either
- Disable the integration for the store by using the toggle on the left if you at a later point in time intend to reuse it.
- OR, edit the API key, leave the input empty and hit save in order to remove the connection to the Klaviyo flow of the store.
- Your Klaviyo integration for the chosen store is now disabled or disconnected.
Return events in Klaviyo
When a customer submits a return request in Float’s return portal, Float will pass that return data to Klaviyo which is then saved as custom metrics within that customer's Klaviyo profile. Since Float uses Shopify data, the customer email is used to tie the return data to the customer's profile in Klaviyo.
Metric overview
Return registered (Float)
When a return is submitted by a customer via the return portal.
Metric payload includes:
Below structure: first bullet is the payload, second bullet is the field format (data type) and third bullet is an example and 4th bullet is other relevant notes.
- return_date
- Text
- "2025-09-23"
- Date of return registration in the return portal
- label_type
- Text
- "PRINT_LABEL"
- Can contain: "PRINT_LABEL", "QR_CODE", "LABEL_CODE", "NO_LABEL"
- returning_from_country
- Text
- "DK"
- Can contain any country and format follows ISO 3166 international standard with Alpha-2 code formatting
- eu_country
- Boolean (True,False)
- TRUE
- label_url
- Text
- Unique URL hosting the label
- return_items
- List
- [ 0:"Product 1" 1:"Product 2" ]
- return_reasons
- List
- [ 0:"Too big" 1:"Too small" ]
- tracking_url
- Text
- Unique tracking URL
- Only available if the carrier supports return tracking
- order_date
- Text
- "2025-09-23"
- Date of Shopify order
- order_name
- Text
- "#12345"
- Shopify order name
- has_exchange
- Boolean (True,False)
- TRUE
- Tracks if the customer requested an exchange
Setting up return notifications in Klaviyo
Many of our customers opt in for using Klaviyo for returns communications and it provides great flexibility in design, tone of voice and customisation possibilities (for instance across countries and regions such as EU vs Non-EU).
Below outlines a guide on how to set up return communications via Klaviyo.
Step 1: integrate Klaviyo.
Please see INTEGRATIONS > Klaviyo for guidance on how to set up the integration.
Once the integration is active, Float will for all returns registered via the return portal share an event called "Return Registered (Float)". This is the event you will use to build an email flow.
Please see INTEGRATIONS > Klaviyo for an event overview of what is included.
Step 2: Setting up the flow.
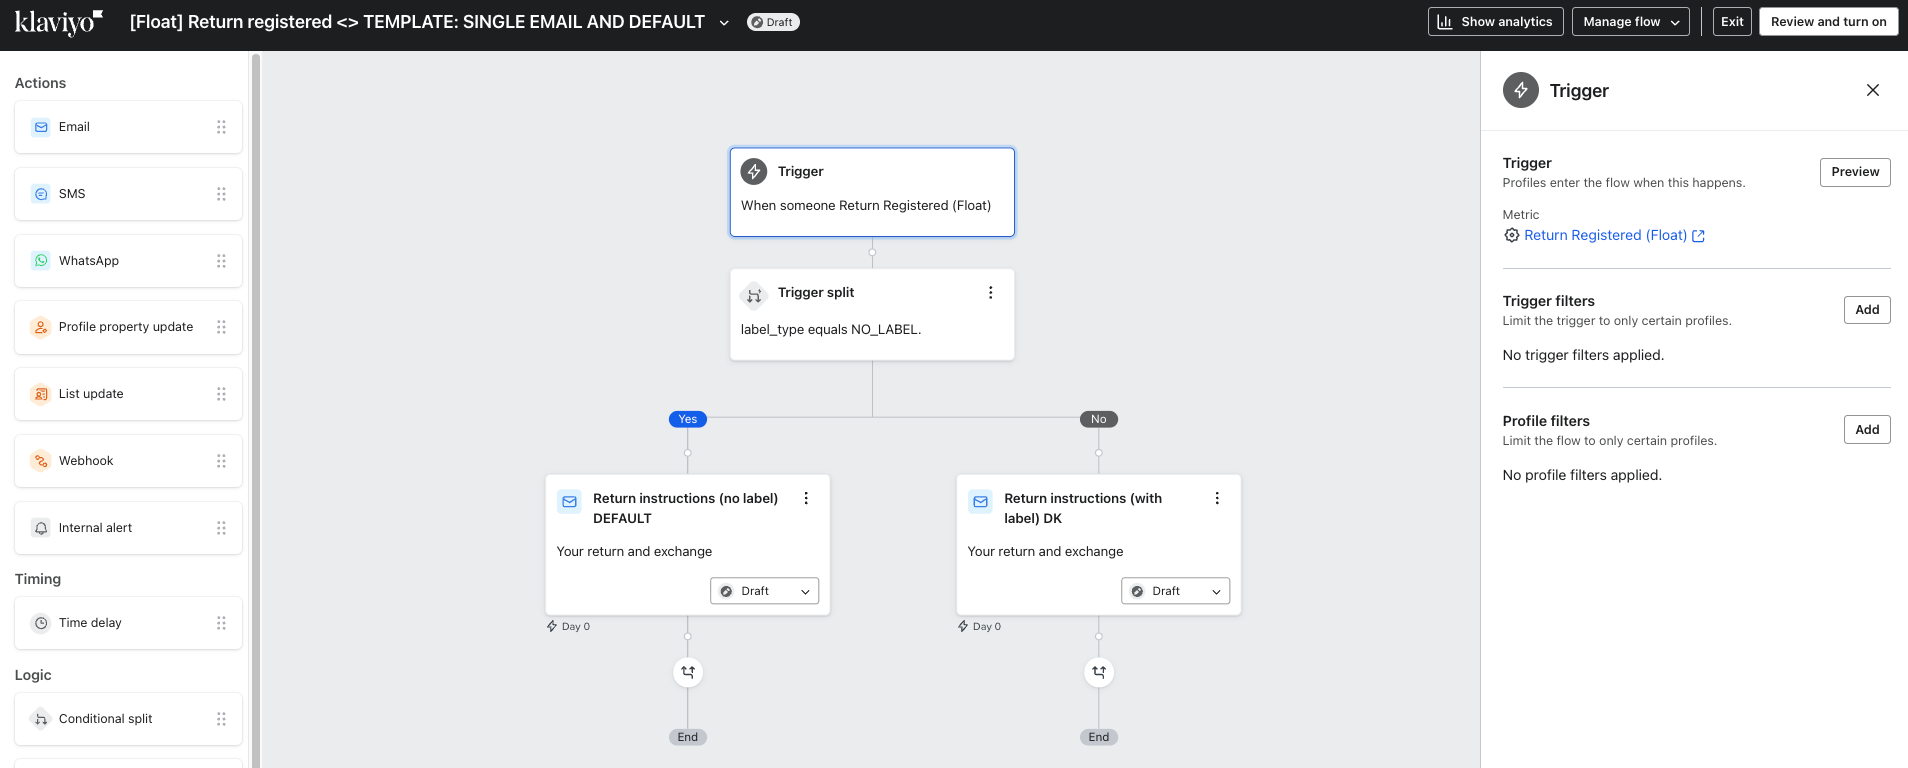
Trigger: Return Registered (Float)
The first important part of setting up your flow, is to match your return guidance with the carrier setup you have created in the Float admin.
IMPORTANT: to ensure that all customers will receive transactional notification e-mails, click "Apply for transactional status" for each e-mail in the flow.Please see more on transactional emails here: [https://help.klaviyo.com/hc/en-us/articles/360003165732](https://help.klaviyo.com/hc/en-us/articles/360003165732
Below is two examples of Klaviyo email flows:
Example 1: Simple email flow
There are two emails in this flow.
Email 1: email delivering the return label and instructions
Email 2: email without a return label and guidance on how to send back on their own. This email serves as a) a fall-back if your carrier setup does not cover that specific country (e.g. you are selling to Denmark and using GLS, but a spanish customer has managed to check out and now needs to return. GLS does not offer returns in Spain and hence the customer will get an email that it is their own responsibility)
Flow technical setup:
The flow uses "Return Registered (Float)" as the trigger.
Then it uses a trigger split with: label_type equals "NO_LABEL".
In the Yes path: these are the customers that have not received a return label and are responsible with returning on their own.
In the the No path: these are the customers that have received a return label.
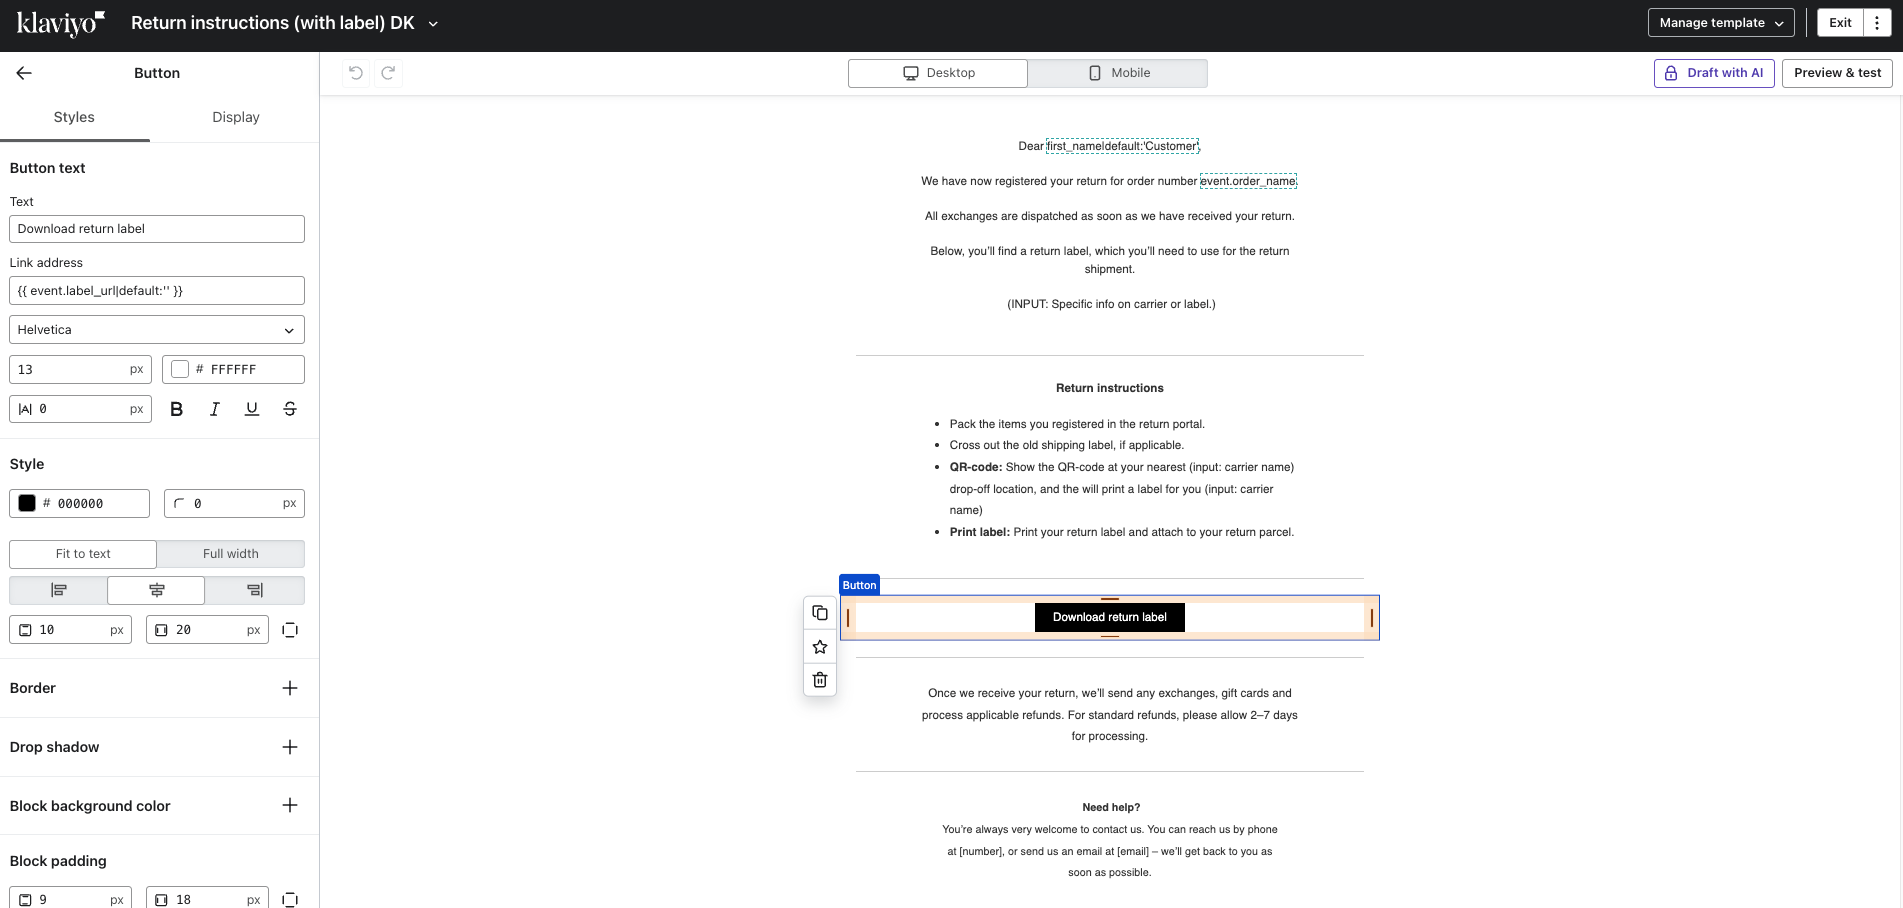
Example of the email with a return label (No path):
Note: the download return label button is using event.label_url|default:'' (remember to add curly brackets) as the Link address (which will provide unique return labels for the relevant customer
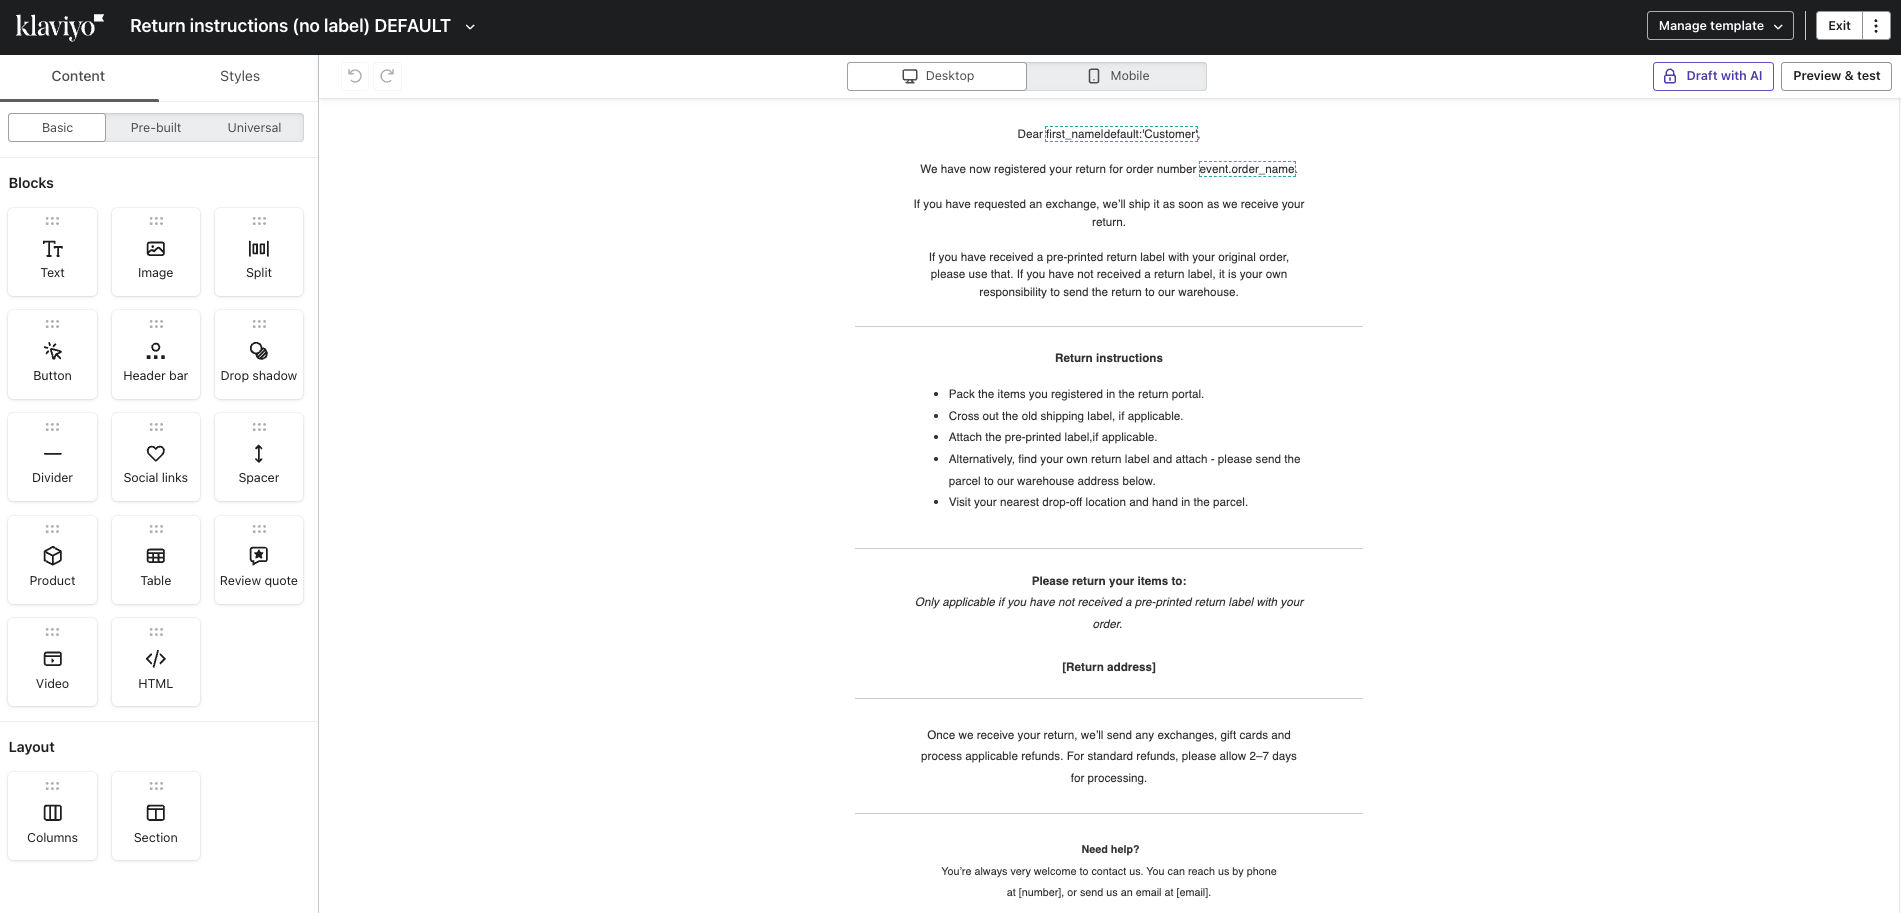
Example of the email with NO return label (Yes path):
Note: here you need to update the flow with specific guidance on return address.